

How to Layer a Viking Costume for Cold Weather
A cold-weather Viking costume works best when the warm layers are planned before the armor. Start with clothing that manages moisture, add insulation without restricting movement, and leave enough room for the outer costume pieces to sit correctly. The result should still function when the temperature changes or activity increases.
Do not build the outfit around a single forecast number. Wind, rain, damp ground, shade, and long inactive periods can make an event feel colder, while walking and wearing leather armor can quickly create excess heat. Every layer should have a clear purpose and, when practical, a way to remove or vent it.
Check the event conditions first
Confirm whether the event is indoors, outdoors, or split between both. Check the current local forecast, expected wind, precipitation, ground conditions, and the time you will arrive and leave. Review the organizer's rules for armor, props, cloaks, bags, heat sources, and changing areas.
Plan for the coldest inactive period, not only the warmest part of the day. Waiting at check-in, standing during a briefing, or sitting after sunset may require more insulation than active play. Keep one warm emergency layer dry and separate from the costume.
Begin with a moisture-managing base
The first layer should fit close enough to sit smoothly beneath a tunic without limiting breathing or arm movement. Choose a base appropriate for the actual temperature and your activity level. Avoid bulky seams beneath fitted armor, especially at the shoulders, sides, waist, and wrists.
Wear the complete base for an hour before the event. Walk, sit, raise both arms, and carry the planned bag. If the fabric twists, rides up, or traps too much heat indoors, those problems usually become worse after adding a tunic and armor.
Add the visible shirt or tunic
The visible fabric layer establishes the Viking-inspired silhouette and separates the body from structured outer pieces. A simple tunic can also remain presentable when armor comes off during a warm break.
Choose enough room for the hidden base layer without creating large folds under a cuirass. Check the neckline, underarms, cuffs, and hem while moving. The active SokolArmory costume collection provides examples of layered sets, while the broader collection directory helps compare separate clothing, armor, boots, and accessories. Verify every live product description before ordering.

Add insulation where it will not disrupt armor
A thin insulating layer can be more useful than one very bulky garment. Concentrate warmth at the torso while preserving shoulder and elbow movement. If the costume includes fitted shoulder pieces, bracers, or hip panels, test the insulation beneath those exact components.
Do not force armor over a thicker layer than it was fitted for. Excess bulk can change strap alignment, push a neckline upward, or reduce reach. If you need substantial insulation, consider wearing it as a removable outer garment during inactive periods instead of compressing it under the armor.
Measure custom pieces with the intended underlayers. Use the SokolArmory measurement guide and identify which garments you were wearing when each dimension was taken. Do not add your own allowance unless the maker requests it.
Fit the armor over the complete clothing system
Put on the base, tunic, and planned insulation before adjusting armor. Close the torso piece without holding your breath or pulling the straps beyond their normal range. Raise your arms, reach forward, turn at the waist, sit, and take a long step.
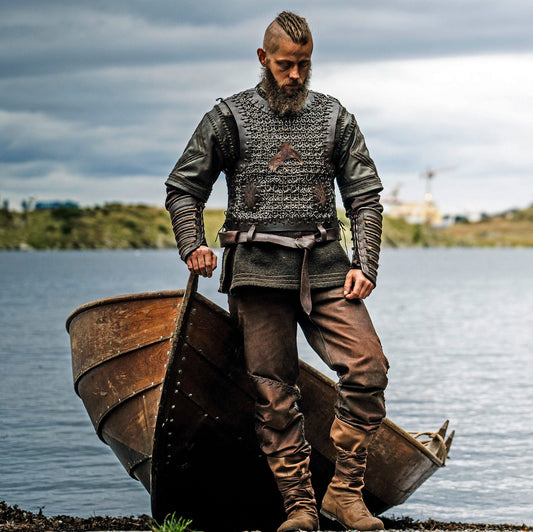
The active Lagertha Viking costume listing currently names a cuirass, shoulder pieces, hip protection, bracers, pants, and boots. It says the parts may be ordered separately, describes an artificially aged finish and individual measurements, and offers personalization on request. Confirm the selected option and included pieces on the live page before buying.
Layered leather panels can retain heat even in cold air. Open or remove an approved component during breaks if you become too warm. Never ignore dizziness, numbness, restricted breathing, or loss of dexterity for the sake of the costume.

Protect hands, head, and neck without losing function
Cold hands make buckles, laces, and safe prop handling more difficult. Choose gloves that allow a secure grip and fit with bracers without creating a hard ridge at the wrist. Test every fastening while wearing the gloves.
A hood, cap, or scarf can add warmth, but it must not block hearing, peripheral vision, or helmet fit. Avoid loose fabric near moving equipment, flames, or crowded combat areas. Follow the organizer's safety requirements even when a warmer accessory looks correct for the character.
Use a removable outer weather layer
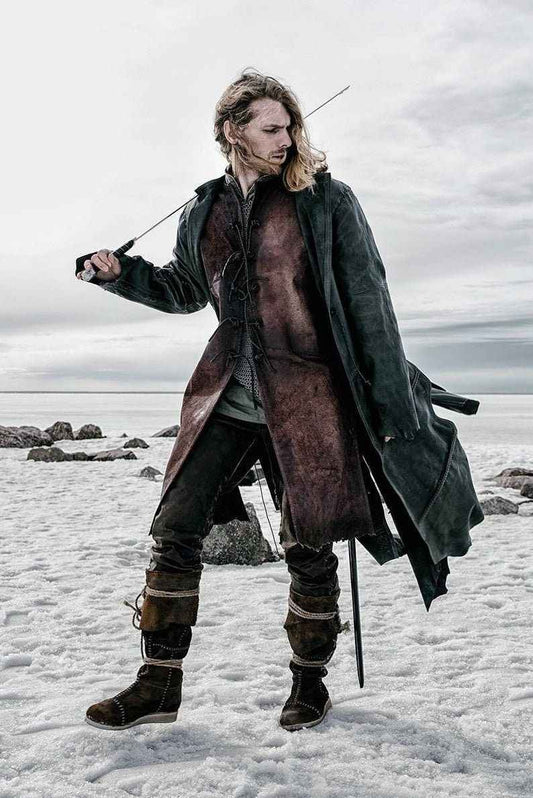
A cloak or coat can protect the costume during inactive periods, but it should not be the only rain plan unless it was designed and tested for that purpose. Bring organizer-approved weather protection and a dry storage bag. Long hems can collect mud, catch on vegetation, or become heavy when wet.
Practice removing the outer layer without disturbing belts, armor, and pouches. Decide where it will be stored during active scenes. A cloak left on damp ground is not useful when the temperature drops later.
Treat trousers, socks, and boots as one system
Wear the planned trousers with the exact socks and boots. Thick socks change fit and can create pressure when the footwear has no extra room. Test stairs, kneeling, uneven ground, and a normal walking pace.
Pack a second pair of dry socks and comfortable backup shoes. Keep footwear separate from clean clothing, and bring a durable bag for muddy items. If boots become wet, change socks promptly and inspect your feet before continuing.
Run a cold-weather dress rehearsal
Test the outfit outdoors in comparable conditions when possible. Spend time both moving and standing still. Check whether you can access water, phone, identification, medication, and hand warmers permitted by the event.
Then move into a warmer environment without changing immediately. This reveals how quickly the costume overheats indoors. Practice a safe layer-removal sequence so you can cool down without placing armor or leather on wet ground.
Photograph the front, back, and sides after movement. Look for shifted straps, bunched insulation, twisted sleeves, and hems close to the heels. Correct one issue at a time and repeat the test.
Cold-weather Viking costume checklist
- Current forecast, venue conditions, and organizer rules.
- Comfortable base layer tested beneath the costume.
- Visible tunic or shirt with full arm movement.
- Thin insulation that does not distort armor fit.
- Armor adjusted over the complete planned underlayers.
- Functional gloves and safe head or neck protection.
- Removable cloak, coat, or approved weather layer.
- Trousers, socks, and broken-in boots tested together.
- Dry emergency layer, spare socks, and backup shoes.
- Water, medication, and essentials accessible in costume.
- Breathable storage for damp fabric and supported storage for leather.
- A complete outdoor movement and temperature test.
The best cold-weather costume is adjustable. Build warmth from the inside out, protect the fit of the armor, and keep one dry layer in reserve. That gives the character a coherent silhouette while preserving the ability to move, cool down, and respond to changing conditions.


User Name 2 Days ago
Lorem ipsum dolor sit amet, consectetuer adipiscing elit. Aenean commodo ligula eget dolor.