

How to Check the Fit of Bracers, Greaves, and a Cuirass
Costume armor should stay in position while you walk, sit, reach, and turn without pinching, sliding, or forcing your body into an unnatural posture. A good fit is not the tightest possible fit. It is a stable fit that leaves room for the intended clothing underneath and allows the joints next to each armor piece to move.
Bracers, greaves, and a cuirass each need a different check. Bracers sit near the wrist and elbow, greaves must clear the ankle and knee, and a cuirass has to balance across the torso. Use the complete costume rather than testing each piece over a T-shirt if you plan to wear it over a tunic, padding, or mail.
Prepare the layers you will actually wear
Put on the base garment, belt, trousers, footwear, and any approved underlayer before adjusting armor. Extra fabric changes circumference and can change where an edge lands. If your event outfit uses a padded layer, test with that same thickness. Do not substitute a heavy sweatshirt and assume the result will match.
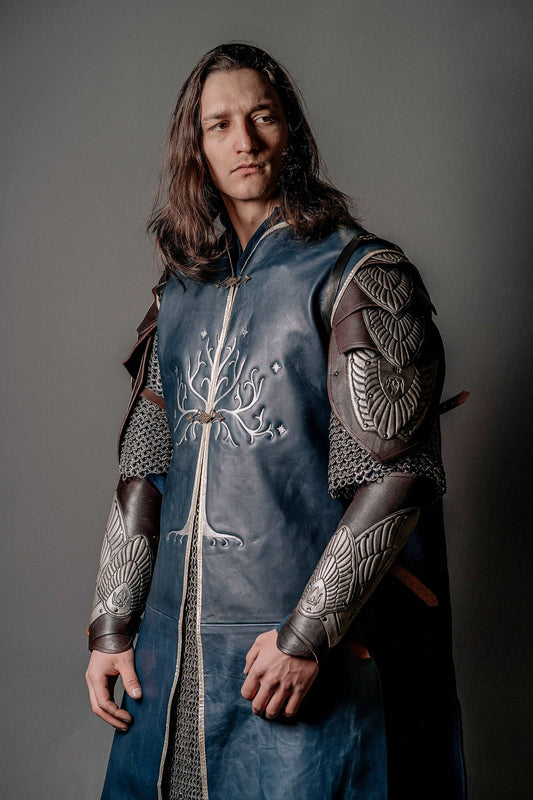
Check the live product description and selected option before dressing. The active Eowyn armor set lists an embossed leather cuirass and leather bracers. The chainmail shown in the styled photographs is explicitly not included, so it should not be counted as part of the set unless purchased separately.
Have a mirror, a phone camera, and another person available if possible. Photograph the front, side, and back while standing naturally. A helper can see twisted straps or a lifted back panel that is difficult to spot alone.

Set the cuirass at the correct height
Start with the shoulder and side adjustments loose enough to position the cuirass. Center it on the body before tightening anything. The neckline should not press into the throat when you look down, and the arm openings should not cut into the front of the shoulders when you reach forward.
Check the lower edge while standing and sitting. It should not drive into the hips, abdomen, or ribs when you bend. A long cuirass can look correct while standing but become uncomfortable in a chair. Sit with your feet flat, lean forward slightly, and take a full breath. If the armor is forced upward or the bottom edge digs sharply into the body, the height or overall size needs attention.
Look at the side view. The front and back should remain balanced rather than pulling forward. If the back rises while the front drops, recheck shoulder position and the tension of each side strap. Do not solve every problem by tightening the waist; that can hide poor vertical placement without correcting it.

Check cuirass lacing and side straps evenly
Tighten paired straps in small steps, alternating from side to side. The goal is even support. One side should not carry all the tension, and decorative panels should not be visibly distorted by overtightening. Keep laces flat and make sure buckles sit where they do not rub the inner arm.
The live Eowyn listing describes handmade leather coloring, engraving, molding, and artificial aging. Small visual differences are part of a handmade finish, but fit should still be evaluated from structure: centered panels, level edges, secure closures, and comfortable breathing room.
Raise both arms, cross them in front of the chest, and reach as though picking up a bag. The cuirass may limit motion compared with clothing, but it should not trap the shoulders or force the neckline into the throat. If a movement is essential for your performance or LARP role, test it now rather than at the event.
Fit bracers without restricting the wrist or elbow
Place each bracer on the intended arm and align its shaped edges before tightening. Keep the wrist free enough to flex the hand and grip a lightweight prop safely. At the upper edge, bend the elbow fully. The bracer should not collide with the elbow crease or pinch the forearm between rigid edges.
Tighten from one end in gradual passes instead of pulling one lace point fully tight. The bracer should resist rotation during ordinary movement, but the skin should not bulge sharply through lacing gaps. Numbness, tingling, cold fingers, discoloration, or throbbing are signs to stop and loosen or remove the piece immediately.
Test both arms independently. Bodies are not perfectly symmetrical, and one forearm may need a different adjustment. If the bracer repeatedly slides toward the wrist, check its orientation and shape before tightening harder.

Fit greaves around the calf, ankle, and knee
Greaves are not included in the featured Eowyn set, but the same fitting logic applies when you add separate lower-leg armor. Put on the trousers, socks, and boots you intend to wear. Position the greave so its lower edge clears the ankle when you walk and its upper edge stays below the knee joint when you bend.
Walk up and down a few steps. Then kneel carefully on a clean surface and take a long stride. Watch for the greave striking the kneecap, catching the boot, or rotating around the shin. A piece that looks centered while standing can shift as soon as the calf flexes.
Adjust paired closures evenly. Avoid routing straps directly through the deepest part of the knee crease or over a prominent ankle bone. If the greave has a clearly shaped left and right side, do not swap them to solve a fit problem.
Run a complete movement test
Wear all armor together for at least several minutes. Walk normally, turn both directions, sit in a standard chair, climb stairs, crouch, kneel, and reach overhead. Repeat the actions with the costume belt and cloak if they will be part of the final outfit.
Listen for new rubbing and watch for pieces pushing one another out of place. A bracer may fit alone but strike a cuirass edge when the elbow bends. A cuirass may fit over a thin shirt but become too tight over mail or padding. Greaves may interfere with boot tops only after several steps.
Take front, side, and back video. Look for gradual rotation, rising edges, loose strap ends, and closures that open under movement. After removing the armor, temporary light pressure marks can occur, but persistent pain, broken skin, numbness, or deep marks mean the fit or adjustment is wrong.
Common costume armor fit problems
- The cuirass rides up when sitting. Recheck its height, lower edge, and torso length instead of tightening the waist harder.
- The neckline presses the throat. Check whether the front hangs too high or the back and shoulder adjustments are pulling unevenly.
- A bracer rotates. Confirm left and right orientation, shape, and lacing pattern before increasing tension.
- A greave hits the kneecap. Lower or resize it; the knee joint needs clear space to bend.
- Armor fits over a shirt but not the event outfit. Repeat measurements and fitting over the actual underlayers.
- One side feels tighter. Adjust each side for the body rather than forcing identical strap positions.
Know what costume armor is designed to do
Decorative leather costume armor is not automatically protective equipment. A product page may describe suitability for cosplay, LARP, or events without certifying it for combat, impact protection, riding, or workplace use. Follow the rules of the organizer and use purpose-rated equipment whenever protection is required.
Do not cut, punch new holes, heat-form, soak, or permanently alter handmade armor until the maker confirms the method. The Eowyn listing says personalization can be requested, so contact SokolArmory when the standard configuration does not suit the intended layers or movement.
Final armor fit checklist
- Wear the real base layers, belt, trousers, and footwear.
- Center the cuirass and balance its front and back before tightening.
- Check breathing, sitting, shoulder reach, and the lower torso edge.
- Keep bracers clear of the wrist and elbow crease.
- Keep greaves clear of the ankle, boot top, and kneecap.
- Adjust paired straps gradually and independently on each side.
- Stop immediately for numbness, sharp pain, or circulation changes.
- Complete a full movement test before the event.
Browse the SokolArmory armor collection to compare cuirasses, bracers, greaves, and complete sets. Use the measurement guide for the maker's current process, and check the broader collection directory when planning the clothing and accessories worn underneath.


User Name 2 Days ago
Lorem ipsum dolor sit amet, consectetuer adipiscing elit. Aenean commodo ligula eget dolor.