

How to Plan a Multi-Piece Cosplay Costume
A multi-piece cosplay costume succeeds when every component has a defined job and enough physical space to do it. Start with the event, build the layer order from the body outward, and treat measurements, movement, footwear, and attachments as connected decisions.
This planning method works for a complete set and for a costume assembled over time. The goal is the same: know what is included, know what touches what, and test the complete system before the event.

Define the event before choosing the pieces
A convention costume, an outdoor LARP outfit, and a stage costume can share a silhouette while needing different solutions. Write down the event date, expected wear time, indoor or outdoor setting, amount of walking, seating, changing facilities, prop rules, and weather exposure. Those conditions determine which layers deserve priority.
For a short indoor appearance, visual accuracy may matter more than storage. For a full weekend, pressure points, temperature, drying time, and access to essentials become more important. Event rules should also decide what weapons, rigid edges, containers, and trailing parts are acceptable.
Choose one reference direction rather than combining details from several versions of a character. Save front, side, and back references when available. Mark which features create the recognizable silhouette and which can be simplified without losing the idea.
Make a component inventory
List every visible and hidden part in a single table or note. Useful categories include base garments, mid-layers, outer garments, armor, belts, hand and forearm pieces, pants, footwear, accessories, props, and weather protection. Add a separate line for closures and attachment hardware.
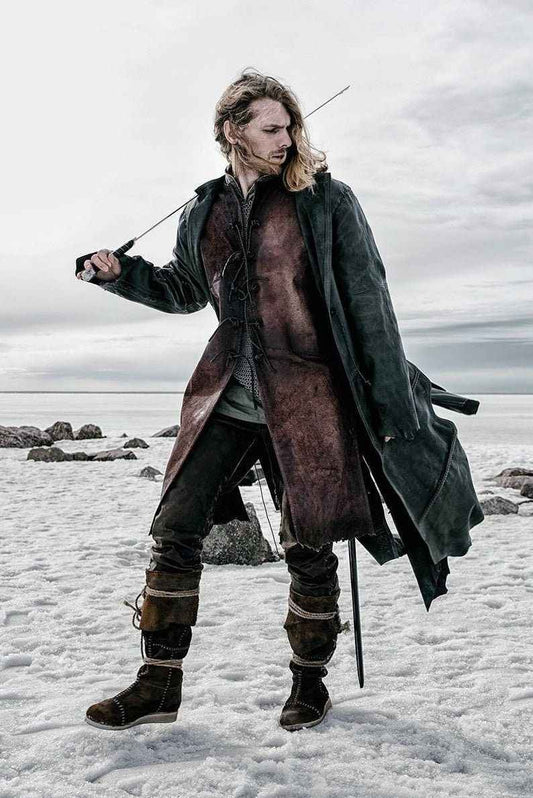
The active Aragorn duster costume provides a practical example. Its current listing identifies a leather coat, leather vest, bracers, linen tunic, leather pants, and boots, and says the parts can be ordered separately. It also presents full-costume and individual-piece variants. That makes the listing useful for comparing a complete purchase with a staged build, but the live selected option still controls what is actually included.
Never build the inventory from photographs alone. Styling accessories may not be included, and one image can show pieces sold under different options. Copy the written included-parts list and confirm any ambiguity before ordering.

Draw the layer order from the body outward
Write the sequence in the order you will dress: base layer, shirt or tunic, pants, fitted vest, coat or armor, belts, bracers, footwear, accessories, then props. This catches conflicts that a shopping list misses.
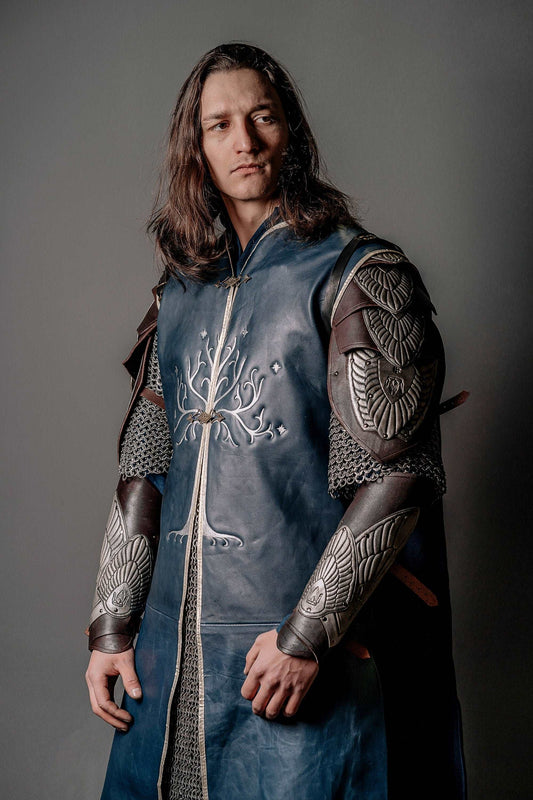
A thick tunic changes the fit of a vest. A long coat changes where a belt can sit. Bracers may overlap sleeves or gloves. Pants must work with both the waistband layers above and the boot shafts below. If two pieces need the same space, decide which one controls the fit before either is made or altered.
Mark every hidden closure. You should know whether a zipper, buckle, lace, or snap remains reachable after the next layer goes on. Plan a dressing order that one person can manage, or identify where a helper will be required.
Assign measurements to the correct layer
Do not treat one body-measurement sheet as sufficient for every component. A shirt, fitted vest, long coat, pants, bracers, and boots each interact with different body landmarks and underlayers. Follow the seller’s method for the exact item rather than transferring numbers from another maker or garment.
SokolArmory’s measurement page says customers choose their usual clothing or shoe size when ordering and receive measurement instructions by email after payment. When you take those measurements, wear the same base layers planned for the costume unless the instructions specify otherwise.
Record the date, units, method, and clothing worn during measurement. Keep the original numbers instead of rounding them to a familiar size. If your build changes—such as adding a padded shirt under a fitted vest—ask whether the affected measurements need to be taken again.

Decide which piece controls the silhouette
Most multi-piece costumes have one dominant garment or armor shape. It may be a long coat, a cuirass, a structured vest, or a broad belt. Establish that piece first, then make supporting layers fit around it.
The active Medieval long vest listing identifies one leather-and-fur vest and notes that personalization can be requested. A long vest changes the torso line, belt position, and the amount of shirt visible. Planning it as an isolated top would ignore the parts of the costume it covers.
Use a full-body outline to mark hem lengths and overlap zones. Add the coat, vest, belt, bracers, and boots one at a time. If the drawing becomes visually crowded, remove a secondary detail before adding another focal point.
Plan the buying sequence around dependencies
Order or finalize pieces in the sequence that reduces fit risk. Base garments come before closely fitted outer layers. Footwear comes before setting a final trouser hem. A wide belt should be tested with the tunic, vest, or coat it will compress. Bracers should be checked against the finished sleeve and glove combination.
A listing that offers separate parts can support a staged build. The active Holga Barbarian costume, for example, currently lists a vest with shoulders, bracers, corset, belt, loincloths with a belt, greaves with fur, and pants, and says the parts can be ordered separately. That structure lets a buyer identify the silhouette-critical pieces before committing to every component.
Do not assume that parts from different product pages will share the same color, finish, proportions, or attachment points. Compare current photographs and written options, then ask for confirmation when a close match matters.
Fit the footwear into the whole system
Boots affect more than the feet. Their shaft height and circumference determine how pants tuck, where wraps sit, and whether greaves can close. Their sole and toe shape also affect walking, stairs, and long periods of standing.
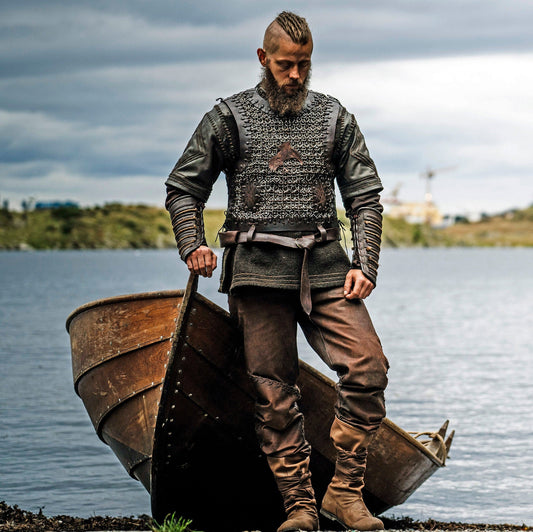
Use the intended socks and any insoles during a footwear test. Walk on a safe surface, climb stairs, sit, crouch, and check contact behind the knee. The active Ragnar Viking boots listing is one example of tall wrapped footwear; verify the live size guidance and selected option rather than estimating from the costume photographs.
Once the footwear is settled, test trouser length and any lower-leg armor again. Avoid a plan that requires last-minute tucking, folding, or strap placement you have never worn for more than a few minutes.
Build a movement and access test
A mirror check is not enough. Put on every layer and perform the movements required by the event. Sit in the narrowest expected chair. Walk up and down stairs. Reach overhead. Turn the head with the collar and shoulder pieces in place. Kneel or crouch if the event requires it.
Then test access. Reach a phone, badge, water, medication, and wallet without removing the costume. Check restroom access and confirm that belts or armor can be released safely. Secure loose straps and identify anything that swings, catches, or strikes another component.
Wear the complete costume long enough to reveal heat and pressure problems. Mark each issue by location and layer. Change one thing at a time, then repeat the test.
Schedule a complete dress rehearsal
Finish the costume early enough for one full rehearsal and one correction cycle. During the rehearsal, use the exact underlayers, makeup constraints, wig or headwear, footwear, props, and bag planned for the event. Time the dressing process and photograph the costume from every side.
For a complex custom project, SokolArmory’s custom-order page describes a process that gathers project details and measurements, discusses materials, and shares progress and final approval photos. Provide one organized reference package and keep written decisions together so the finished components follow the same plan.
Multi-piece costume planning checklist
- Define the event conditions, wear time, and organizer rules.
- Choose one character version and identify the silhouette-critical pieces.
- Copy the written included-parts list from each live product page.
- Draw the complete layer order and mark closure access.
- Take measurements using the instructions for each component.
- Order base layers before fitted outer layers and footwear before final hems.
- Confirm colors, materials, personalization, and included accessories in writing.
- Test movement, seating, heat, noise, snag points, and access to essentials.
- Complete a timed dress rehearsal with every planned item.
A multi-piece cosplay costume is easier to manage when the plan records dependencies instead of treating every item as a separate purchase. Build from the event inward, then from the body outward. The resulting costume will be clearer to buy, easier to fit, and far less likely to reveal a conflict on event day.


User Name 2 Days ago
Lorem ipsum dolor sit amet, consectetuer adipiscing elit. Aenean commodo ligula eget dolor.