
How to Build a Ranger Costume for LARP
A practical ranger costume for LARP starts with movement and load carrying, then builds the silhouette around those needs. Choose the base garments first, decide where the belt and pouches will sit, and add the coat, bracers, and boots only after you know how the complete kit must move.
The result does not need the maximum number of accessories. It needs a clear outer shape, accessible gear, and layers you can wear for the event you actually attend.
Define the ranger before buying the costume
Write a short brief for the character. Is this a woodland scout, a road-worn traveler, a royal ranger, or a fantasy hunter? Decide whether the look should be polished, weathered, dark, earthy, or high-contrast. This prevents the coat, belt, bracers, and boots from looking like unrelated purchases.
Next, describe the event conditions. Record the season, likely temperature, terrain, amount of walking, rules for props, and whether the costume must support active play. A long coat that looks excellent in a portrait may need a different hem, closure plan, or removable layer for a crowded indoor game.
Choose two identity pieces before adding details. For most ranger silhouettes, the outer coat or cloak is one; the second may be a fitted vest, distinctive belt system, bracers, or tall boots. Put the fitting time into those pieces and keep the base garments simple.

Choose the outer coat by movement, not length alone
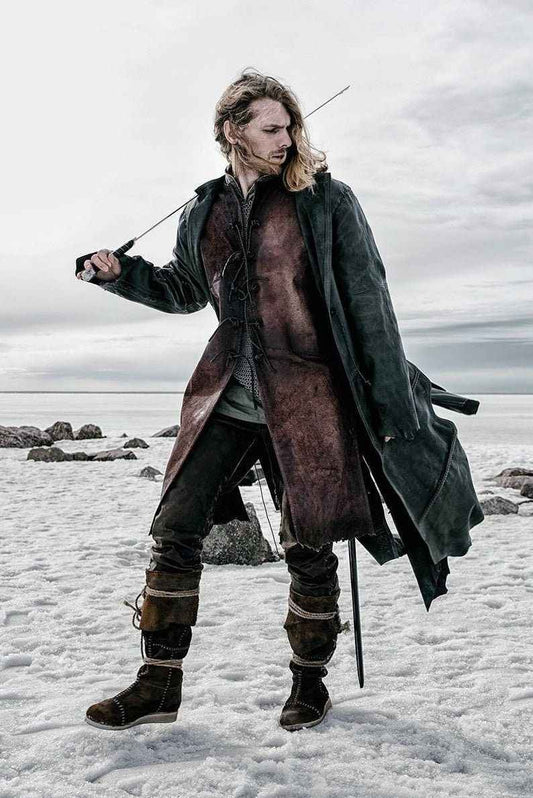
A ranger coat controls the costume's outline from shoulders to calves. Check shoulder width, sleeve reach, front closure, side or back openings, and where the hem falls when you kneel. A long straight hem can catch beneath a chair or brush the ground on stairs. A split or shaped lower section can move more freely, but it still needs a real wear test.
The active Aragorn Strider black duster, SKU rnc0001, is currently listed as one handmade natural-leather coat made to individual measurements. Its live selector offers S through XL with full-payment and 50-percent installment labels.
There is an important description mismatch: the product title and current photograph identify a black duster, while the written description calls it brown. Confirm the intended color with SokolArmory before ordering. Do not infer color from one field when the live page uses conflicting labels.
Build the base layer before measuring the coat
Wear the shirt, tunic, vest, or padding planned for the event before taking coat measurements. A coat fitted over a thin shirt may bind when a vest is added. Too much extra room, however, can create folds at the shoulders and interfere with a belt or quiver strap.
Use the maker's measurement instructions and identify every underlayer in the order notes. Do not add your own allowance unless the instructions request it. Measure both arms in the position specified and confirm the intended coat length while wearing the boots or footwear with the expected sole height.
Test the base layers without the coat first. Raise both arms, draw them across the chest, kneel, and sit. If the tunic or vest already restricts those movements, the outer coat will not solve the problem.

Use a complete costume as a component map
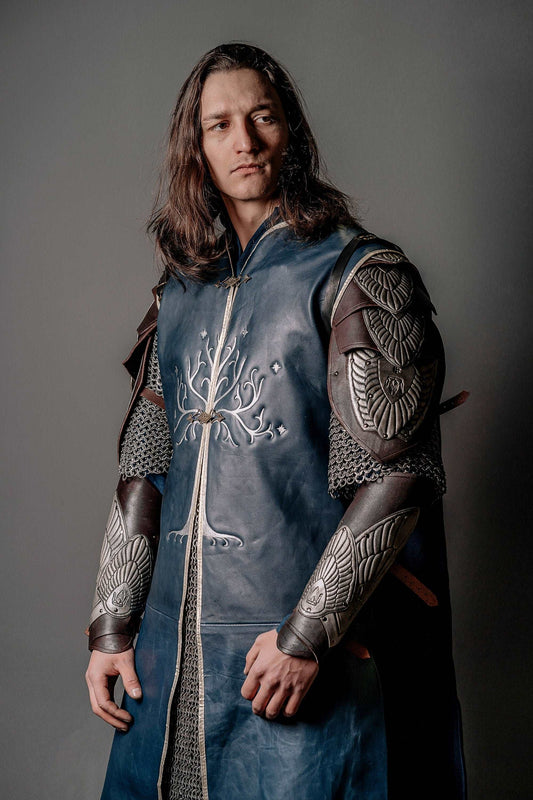
The active Aragorn Strider costume, SKU cst002, provides a useful map of a full ranger outfit. Its written list names a leather coat, leather vest, bracers, linen tunic, leather pants, and boots. The current selector also contains full-costume choices and separate component options, so the selected variant matters as much as the hero image.
Use those six zones to plan any ranger costume:
- Base torso: a tunic or shirt that manages heat and remains comfortable under the vest.
- Outer torso: a vest or coat that establishes the silhouette without blocking shoulder movement.
- Forearms: bracers that fit the sleeve and still allow wrist movement.
- Waist: a belt system that supports practical items without distorting the coat.
- Legs: trousers that permit long strides, kneeling, and boot overlap.
- Feet: footwear selected for the terrain and event rules.
If you already own two or three reliable zones, buying separate pieces may be more useful than duplicating them. If every zone is missing and the coordinated appearance is the priority, a complete set reduces matching decisions. Confirm exactly which live option you select before checkout.
Plan the belt around access and weight
A ranger belt is often expected to hold pouches, a bottle, gloves, or approved props. Place the heaviest item close to the body and keep the front clear enough for sitting and bending. Test each item with the coat open and closed.
Do not use the belt to repair the fit of an oversized coat or vest. Tightening it may create folds, pull the front closure off center, and restrict breathing. The torso layers should fit before equipment is added.
If you use more than one belt, give each one a job. One may shape the garment while another carries equipment. Offset buckles and hard attachments so they do not stack at the abdomen. Walk briskly and kneel to see whether pouches swing, slide, or catch the coat hem.

Fit bracers over the actual sleeves
Bracers add a strong ranger detail, but their fit depends on the sleeve beneath them. Measure and test with the intended garment. A loose sleeve can bunch under the bracer; a thick cuff can place the closure at the wrist joint.
The active Robin Hood leather bracers page currently offers one-hand and two-hand options. The photographed style includes hand coverage, wrist articulation, buckled straps, and decorative leather work. Confirm which option and quantity are selected rather than assuming the photograph represents the chosen variant.
After fastening the bracer, make a fist, extend the wrist, grip a cup, and use a phone. Check for pressure at the base of the thumb and for edges that meet the hand during extension. If gloves are part of the costume, test the glove cuff under and over the bracer to find the cleaner, more comfortable order.
Select boots for the ground and trouser overlap
Footwear has to work with the terrain before it completes the silhouette. Determine whether the event uses grass, dirt, gravel, pavement, indoor flooring, or several surfaces. Check the organizer's footwear requirements when active play is involved.
Plan the trouser hem at the same time. Trousers may tuck inside the shaft, sit under wraps, or fall over a shorter boot. The combination changes calf bulk and can affect the boot fit. Measure over the actual socks and lower-leg layers.
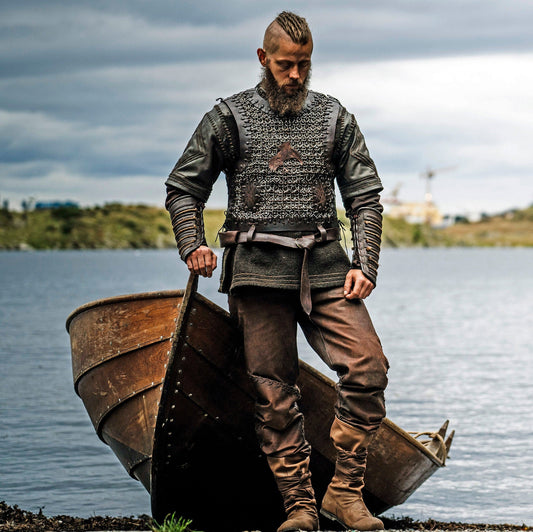
The active Uhtred black high leather boots are a visual example of a tall black ranger-style boot with multiple horizontal straps. Use the live product information for sizing and materials, and test any tall boot for comfort behind the knee before the event.
Test the costume as one moving system
Put on every planned layer, including socks, footwear, belt load, bracers, gloves, and any approved prop. Walk for a sustained period, take stairs, sit in a standard chair, kneel on both knees, crouch, reach overhead, and take a long stride.
Watch the interfaces between pieces. The coat may pull when the belt is loaded. Bracers may meet the sleeves only when the elbows bend. Boot shafts may trap gathered trouser fabric. A shoulder strap may drag the coat collar to one side. Correct those interactions rather than evaluating each product alone.
Practice removing the warmest outer layer while keeping the character recognizable. Decide where that layer can be carried without dragging or being folded against dirty gear. For a long event, this can be more useful than adding another decorative accessory.
Separate character detail from LARP function
A worn finish, dark leather, a long coat, and layered belts can communicate a ranger quickly. They do not determine whether an item is suitable for combat, weather, or a particular game's safety rules. Ask the organizer about props and active-play equipment. Treat costume product descriptions as costume information, not independent safety approval.
Use the SokolArmory costume collection to compare silhouettes and component combinations. Product and gallery photographs are useful visual references, but the live option selector and included-parts list determine what arrives.
Final ranger costume buying checklist
- Define the ranger concept, event conditions, terrain, and movement needs.
- Choose the outer silhouette and one supporting identity piece.
- Build the base layers before measuring the coat.
- Confirm color when the product title and description disagree.
- Position belts and equipment while the full torso stack is worn.
- Fit bracers over the actual sleeves and test wrist movement.
- Match boots to the ground and planned trouser overlap.
- Verify the exact live option and included components.
- Complete a full movement and heat test before the event.
A convincing ranger costume comes from a controlled silhouette and a kit that moves together. Start with the body and the event, add the coat and load-bearing pieces deliberately, and test every overlap before committing to more detail.


User Name 2 Days ago
Lorem ipsum dolor sit amet, consectetuer adipiscing elit. Aenean commodo ligula eget dolor.