

How to Style a Fantasy Costume for Winter Photos
Winter fantasy costume photos look convincing when the location, light, clothing, and shooting schedule support one another. The costume still has to keep the model mobile and safe, and the photographer needs enough time to work without leaving anyone standing in the cold for long periods.
Build the look around short outdoor shooting blocks. Use warm hidden layers, simple adjustments between frames, and a nearby dry place for breaks. A strong silhouette and a few visible textures usually photograph better than many small accessories.
Choose the location before finalizing the costume
Check access, parking distance, permissions, opening hours, ground conditions, wind exposure, and the nearest warm shelter. Snow, ice, wet grass, rocks, and shorelines each require different footwear and movement limits.
Visit the location at the planned time when possible. Note where the sun falls, which backgrounds are uncluttered, and how far the model must walk from the changing area. Do not rely on a remote landscape if the costume cannot be transported safely.
Build warmth beneath the visible layers
Start with a close-fitting base appropriate for the temperature and activity level. Avoid bulky seams beneath bracers, belts, or fitted armor. Add thin insulation at the torso while preserving shoulder and elbow movement.
Test the costume indoors and outdoors. A layer that feels comfortable while standing in cold air may become too warm after walking uphill in leather and armor. Prepare a sequence for venting or removing an outer piece during breaks.
Measurements should reflect the clothing worn beneath the costume. Use the SokolArmory measurement guide when a listing requests measurements, and record the underlayers worn during the process.

Fit armor over the complete winter system
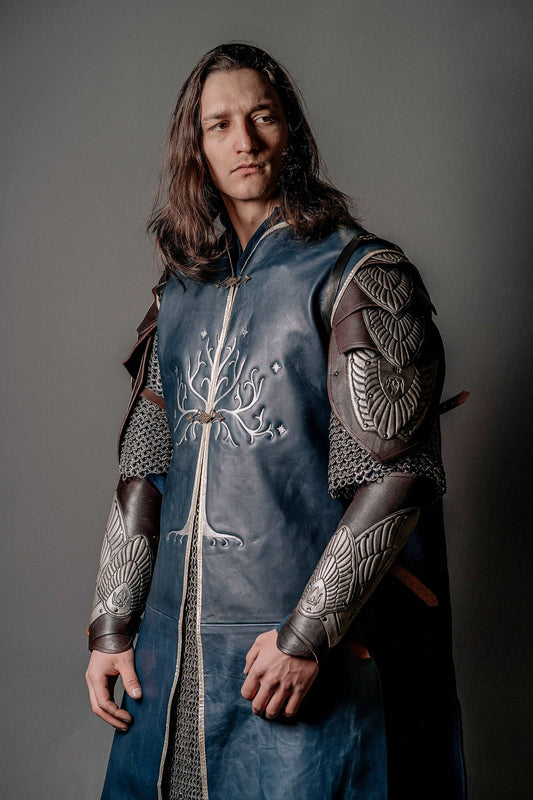
Put on every planned base and insulating layer before adjusting a vest, cuirass, bracer, or belt. Raise both arms, reach forward, turn at the waist, sit, and take a long step. The armor should not require the model to hold their breath or limit safe footing.
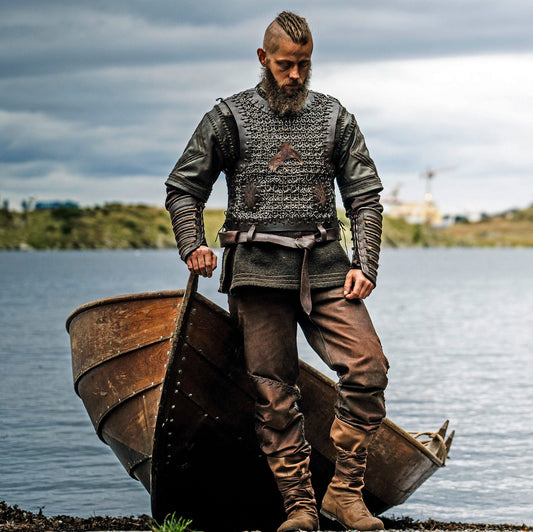
The active Ragnar costume listing currently names a vest with chainmail, leather underlayer, belt, bracers, leather pants, and boots. It says the parts can be ordered separately and describes individual measurements, an artificially aged finish, handmade leather work, and personalization on request. Confirm the selected option and written contents on the live page before ordering.
If thick insulation changes the fit, move that warmth to a removable cloak or coat used between frames rather than forcing fitted armor over excess bulk.
Use a restrained winter palette
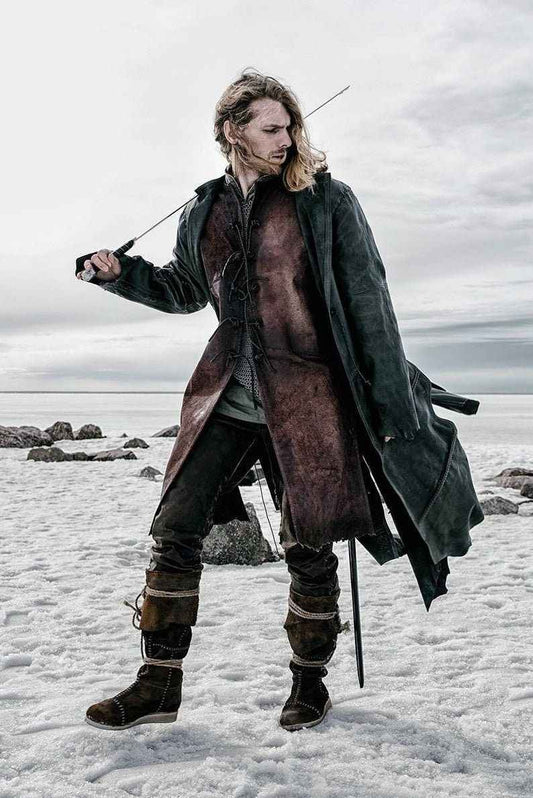
Snow and pale winter skies create a bright background. Dark brown, black, charcoal, burgundy, muted green, and weathered metal details separate clearly from it. Against bare trees or dark stone, add one lighter garment or exposed edge so the silhouette does not disappear.
Limit the visible palette to two or three main colors. Repeat one detail at the belt, bracers, or shoulder line. Texture from leather, fabric, and linked metal can provide depth without additional accessories.

Choose props that support one clear story
A small accessory, belt object, cloak clasp, or approved prop can establish the character. Use one or two items rather than filling every hand and pouch. The model should be able to change pose without placing valuable pieces in snow or mud.
Confirm local and venue rules for weapons, replicas, animals, smoke, fire, drones, and commercial photography. Prepare a prop-free version of the shot list in case access conditions change.
Protect hands, feet, and face between frames
Keep warm gloves, a hat, and an outer coat immediately available outside the frame. Costume bracers can be worn for the photograph, then loosened or removed during breaks if permitted. Cold hands make small buckles and laces difficult to operate.
Use footwear suitable for the ground, not only the costume. Pack dry socks and traction appropriate to the location. Never ask the model to balance on ice, stand in moving water, or climb unstable terrain for a pose.
Plan short shooting blocks
Create a shot list before dressing: full front, three-quarter, profile, back detail, movement, and two close-ups. Start with the frames that require the complete costume. Save removable details for later so the outfit becomes simpler as the model gets colder or tired.
Use short outdoor blocks followed by warm breaks. Check fingers, feet, breathing, and coordination. Stop immediately if the model develops numbness, uncontrolled shivering, confusion, unusual fatigue, or loss of dexterity.
Control condensation and wet gear
Moving cold equipment into a warm space can create moisture. Keep cameras and lenses in their protective bags while they adjust, following the equipment maker's guidance. Store spare batteries close to the body when safe and permitted because cold can reduce performance.
Do not seal wet leather or fabric in plastic for the journey home. Remove surface moisture with a clean dry cloth, separate damp materials, and allow airflow when practical. Avoid direct heat and unfamiliar leather treatments.
Prepare the costume the day before
Pack clothing, armor, footwear, props, warm break layers, towels, water, snacks, hand protection, and a dry change of clothes. Pad hard fittings so they cannot scratch other pieces. Keep liquids separate from costume materials.
Review the costume collection for full-look references and the wider collection directory for separate pieces, but stop adding untested components before the shoot.
Winter fantasy photo checklist
- Location permission, forecast, access, and warm shelter.
- Base and insulating layers tested under the costume.
- Armor fitted over the complete winter clothing system.
- Safe footwear, dry socks, and warm break clothing.
- Simple palette and one clear character story.
- Event-compliant props plus a prop-free shot list.
- Short shooting blocks and scheduled warm breaks.
- Clean dry cloths and breathable storage for damp gear.
- Dry change of clothes, water, food, and essentials.
The best winter images come from preparation rather than endurance. Keep the model warm between frames, reduce unnecessary costume pieces, and use the location and light to carry the atmosphere.


User Name 2 Days ago
Lorem ipsum dolor sit amet, consectetuer adipiscing elit. Aenean commodo ligula eget dolor.