

How to Combine Separate Costume Pieces Without Fit Conflicts
Separate costume pieces give you more control over comfort, weather, and character detail, but they also create more opportunities for fit problems. A tunic that feels fine by itself can bunch under a vest. A belt can pull a coat out of line. Bracers can collide with wide cuffs, and tall boots can make trousers twist at the knee.
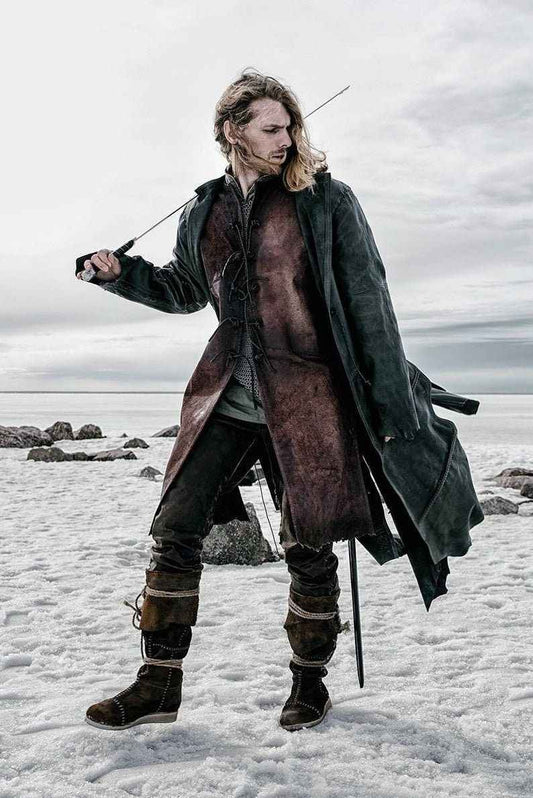
The solution is to treat the outfit as one system. Plan the order of the layers, measure while wearing the pieces that sit underneath, and test the complete build before the event. The current Aragorn duster costume is a useful example because its listing identifies a coat, vest, bracers, tunic, pants, and boots as separate components. The same method works for many outfits in the SokolArmory costume collection.
Put the layers in a fixed order
Write down every visible and hidden piece before checking fit. Start at the skin and work outward: base layer, shirt or tunic, vest or cuirass, coat or cloak, belts, arm pieces, trousers, and footwear. Add pouches, weapons, and other accessories only after the clothing and armor sit correctly.
This order matters because each layer changes the space available to the next one. A fitted vest may close easily over a thin tunic but feel restrictive over a thicker shirt. A long coat can hang cleanly until a wide belt compresses its front panels. Testing in the intended order reveals those conflicts while they are still easy to correct.

Measure with the real underlayers on
Body measurements are the starting point, not the whole fitting process. When a coat, vest, or cuirass will be worn over another garment, take the relevant measurements while wearing that garment. Use the actual shirt or tunic if you already own it. If you do not, use a layer with similar thickness and sleeve construction.
Follow the requested measurement method rather than adding your own allowance. Different patterns use body measurements and finished-garment measurements in different ways. The SokolArmory measurement guide is the right reference when a listing asks for custom measurements. Also check the selected product option and the live description before ordering, since included pieces and sizing instructions can differ by listing.
Fit the torso before adding belts
Close the tunic, vest, and coat in sequence. Check the neckline, armholes, chest, waist, and hem before putting on a belt. Each closure should meet without pulling the layer beneath it into hard folds. The garment should also return to its normal position after you raise and lower your arms.
If the outfit includes both a long vest and a long coat, compare the side seams and center lines. They do not need to match perfectly, but persistent twisting usually means one layer is catching on another. Smooth the inner layer, reset the closures, and check again. Do not use a tight belt to hide a torso problem; the pressure often makes the bunching worse.
Check shoulders, sleeves, and bracers together
Shoulders and elbows need a full movement test. Reach forward, cross your arms, raise both hands, and bend each elbow completely. Watch for a sleeve that pulls the neckline backward or a vest armhole that presses into the front of the shoulder.
Put bracers on after the sleeve test. Their top edge should not fight the cuff every time the elbow bends. If the sleeve is generous, arrange the fabric consistently before tightening the bracer. If the cuff has bulky trim or a closure, place that detail where it will not sit directly under a rigid edge or buckle.
The live Aragorn Strider costume listing identifies a coat, vest, bracers, tunic, pants, and boots. That component order shows why an isolated wrist measurement is not enough: the sleeve and bracer still have to function as a pair.
Set belts after the upper layers hang correctly
A costume belt has two jobs: it supports accessories and helps define the silhouette. It should not carry the burden of forcing an incorrectly fitted vest or coat into shape. First let the torso layers settle naturally. Then place the belt at the intended height and test it with the actual pouches or scabbard you plan to carry.
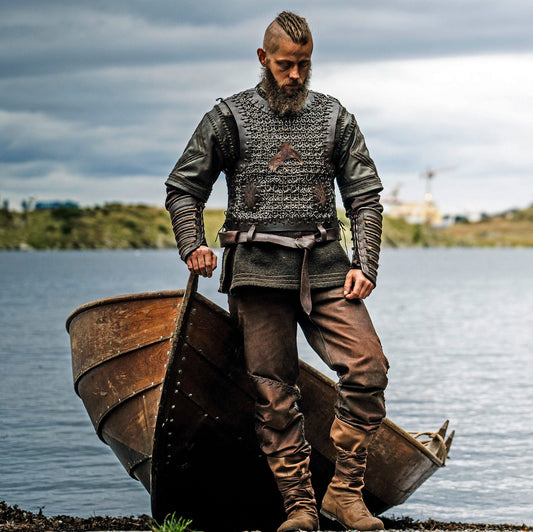
Walk, sit, and take several long steps. A loaded belt can migrate upward, drag one side of a coat down, or press into the top of a cuirass. Adjust one variable at a time: belt height, accessory position, or strap length. That makes the source of the conflict much easier to identify. The belt close-up from the Stealthy Assassin costume also shows why the layers beneath a wide belt need to lie flat before it is tightened.

Test trousers and boots as one unit
Put on the intended socks before checking boots. Then arrange the trouser hem the way you plan to wear it: over the boot, tucked inside, or gathered above it. Kneel and take a high step. Fabric trapped inside a tall boot can pull at the knee even when the trousers fit correctly at the waist.
Check the seat and thigh while sitting as well as standing. A long coat may conceal a twisted waistband, but it will not prevent discomfort during a full day. Finish by walking on stairs or a safe incline to confirm that long hems, cloak edges, and boot tops do not interfere with each other.
Run a complete movement test
Once every piece is on, spend at least a few minutes moving in the full outfit. Sit in a chair, kneel, reach overhead, turn at the waist, and walk at your normal pace. If the costume is for LARP, repeat the safe movements you expect to use while carrying only permitted event equipment.
Photograph the front, back, and both sides. A photo often reveals a shifted belt, twisted coat, uneven bracer, or trapped cloak edge that is hard to see while wearing the costume. Make one change, repeat the movement, and take another photo. Small, controlled adjustments are more reliable than changing several straps at once.
Avoid the most common assembly mistakes
- Ordering every piece from one body measurement. Each layer has its own fitting role and may require different information.
- Testing pieces only one at a time. A good individual fit can still conflict with the layer above or below it.
- Tightening belts and bracers too early. Fit the soft layers first, then add compression and hardware.
- Ignoring seated and kneeling positions. Standing in front of a mirror does not show every restriction.
- Assuming the pictured set matches every option. Read the current listing and confirm exactly what the selected option includes.
Keep care and packing piece-specific
Separate pieces may use different materials, finishes, and hardware, so one cleaning method may not suit the entire outfit. Follow the care directions supplied for each item. Let pieces dry as directed before packing, keep hard fittings from pressing into softer surfaces, and use a packing order that prevents buckles from catching fabric.
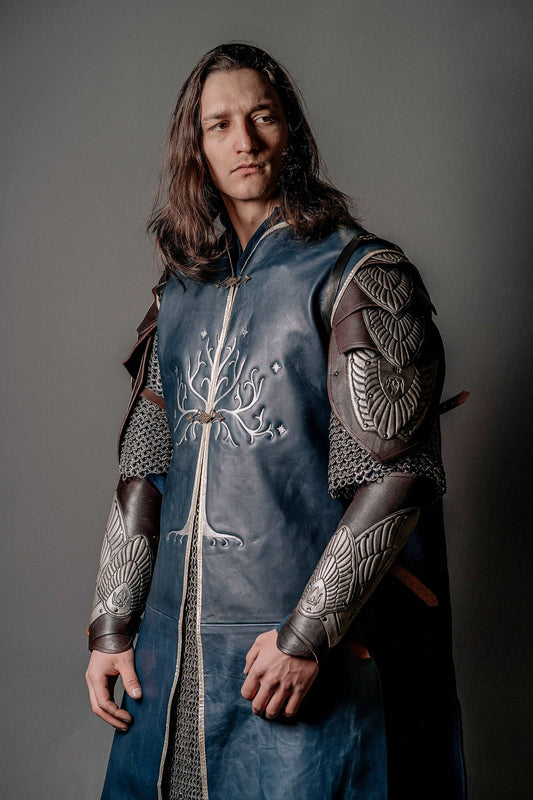
For a more complex example, the current Faramir costume listing names a cuirass, tunic, bracers, belt, cloak, trousers, boots, and raincoat, with parts available separately. Building that kind of outfit from the inside out keeps the fit decisions understandable. Start with the base garments, add structure, place belts and arm pieces, then test the outer layers in motion.
A layered costume is ready when every component can do its job without pulling another one out of position. Confirm the live product details, measure in the correct underlayers, and test the whole outfit early enough to make calm adjustments before the event.


User Name 2 Days ago
Lorem ipsum dolor sit amet, consectetuer adipiscing elit. Aenean commodo ligula eget dolor.