
How to Build a Witcher-Inspired Costume in Layers
A convincing Witcher-inspired costume works because the layers have a clear order. Start with a breathable shirt, add a fitted mid-layer, build the armor over it, and finish with belts, gloves, boots, and a few controlled details. Buying every visible piece at once is less important than making sure each layer fits over the one beneath it.
This guide uses current SokolArmory listings as practical examples. Always verify the live product description, selected option, included parts, measurements, and event rules before ordering.
Choose one version of the character first
Witcher costumes vary widely in color, armor construction, and silhouette. Pick one reference direction before shopping: dark black armor, brown Kaer Mohen-style layers, a game-inspired gambeson, or a lighter travel outfit. Mixing recognizable pieces from several versions can work for an original monster hunter, but it will look less specific.
Create a short priority list. For a convention, you may value an accurate upper-body silhouette and clean photographs. For an outdoor LARP, range of motion, heat management, and secure closures matter more. For a stage production, the costume must read clearly at a distance and survive repeated changes.

Build from the base layer outward
The base layer sits against the skin and under everything else. It should allow full shoulder and elbow movement without bunching under armor. Long sleeves can reduce rubbing from bracers or straps, while an open neckline can help with heat. Choose the visible color deliberately because the shirt will show at the neck, wrists, and gaps between armor pieces.
Above that comes the mid-layer: a tunic, quilted garment, or fitted jacket. Its thickness changes every armor measurement. Never size a breastplate or wide belt over a thin T-shirt if you plan to wear a substantial gambeson at the event.
The active Witcher armor from season 2 listing shows this order clearly: a dark tunic and trousers sit below a leather cuirass, pauldrons, bracers, belts, and boots. The current product page lists those components separately and says individual parts may be ordered by contacting SokolArmory.
Start with a shirt you can move in
Test the shirt before adding armor. Reach both arms overhead, cross them in front of your chest, bend the elbows fully, and turn at the waist. Pulling across the upper back will become more noticeable once straps and pauldrons are added.
Color and finish set the tone. A clean white shirt creates contrast; a dark or weathered shirt blends into the armor. The active Witcher white shirt listing names one white linen shirt, states that it is made to individual measurements, and notes an artificially aged finish. Its photograph also shows how an open neckline and rolled sleeves can remain visible under belts and accessories.

Add a gambeson or tunic as the structural middle
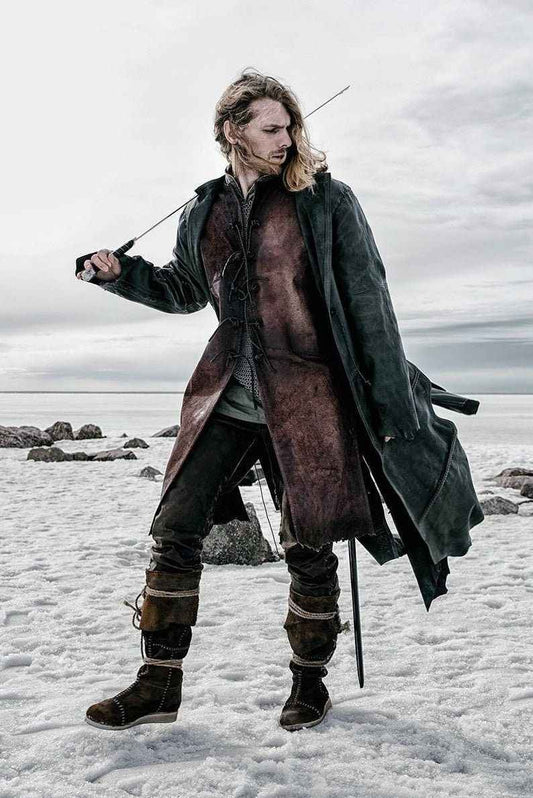
The mid-layer shapes the torso and separates hard armor from the base shirt. Decide how much of it should remain visible below the cuirass and at the sleeves. A long coat creates a strong vertical line and can stand on its own when the armor comes off; a shorter fitted layer keeps the legs clearer.
The active long Witcher-inspired gambeson coat is listed as one dark gray garment with brown leather edging, extending to the shin and made to individual measurements. Its front buckles and high collar provide visual structure without requiring a breastplate in every scene.
Put on the intended shirt before measuring this layer. Then wear both before measuring armor. If the mid-layer has thick seams, a raised collar, or overlapping front panels, check where armor edges and straps will cross them.

Fit the torso armor before the accessories
The cuirass or breastplate controls the visual center of the costume. It should stay stable when you walk and turn without pressing into the throat, ribs, or hips. Sit in a normal chair and bend forward slightly; an armor piece that looks fine while standing may collide with the belt or thighs when seated.
Add pauldrons after the torso piece is positioned. Raise your arms, reach forward, and turn your head. Check that the shoulders do not push the cuirass upward or strike the neck. Bracers come next, with enough space at the wrist and elbow to avoid restricting the hands.
The active Kaer Mohen Witcher costume, SKU cst012, lists a molded leather breastplate, pauldrons with chainmail, gambeson, wide belt with chainmail, belt, gloves, pants, and boots. The page says the pieces can be ordered separately and that the order is made to individual measurements. Verify the current option carefully because the live listing includes full-payment, installment, and individual-component selections.
Use belts to organize the silhouette
Witcher-inspired outfits often use more than one belt, but each should have a purpose. A wide waist piece can anchor the torso armor. A narrower belt can carry a pouch or divide the tunic visually. A diagonal harness can support a scabbard or simply create the expected line across the chest.
Do not tighten belts until the armor appears fitted. Over-tightening can hide a sizing problem while restricting breathing and movement. Sit, crouch, and twist after every adjustment. If you carry costume weapons, follow the venue's current prop rules and make sure straps cannot snag the costume or other visitors.
Add gloves, pants, and boots after the upper body fits
Gloves should allow you to use closures, handle a phone, and safely manage approved props. Test them with bracers because the cuff and forearm armor may overlap. Confirm that you can make a fist without the glove pulling at the fingertips.
Pants must work under belts and long tunic panels. Walk up stairs, kneel, and take a long stride before deciding the fit is complete. Boots need enough room for the socks you will actually wear, and tall shafts should not press behind the knee while sitting.
Break in footwear before an all-day event. If costume boots do not suit the terrain or your feet, use comfortable dark footwear and let the upper layers carry the character.
Control weathering and small details
Weathering looks convincing when it follows use: edges, raised areas, knees, elbows, and places handled often. Apply the same visual logic across the costume. A heavily aged shirt under spotless armor can look disconnected unless that contrast is intentional.
Choose a few details that support the silhouette: a medallion, pouch, gloves, belt hardware, or wig. Adding every recognizable accessory can create clutter and extra weight. Step back several feet or take a full-length photograph; remove any piece that competes with the main armor shape.
Measure in the correct order
Use the SokolArmory measurement guide and follow any product-specific instructions sent by the maker. Take body measurements over the undergarments planned for the event. Take armor-related measurements over the actual shirt and mid-layer when requested.
Record the layer used for each measurement so you do not mix values later. Measure both sides when relevant, especially arms and calves. Wear the planned socks for footwear measurements and tell the maker about unusual shoulder pieces, padding, or asymmetry.
Run a complete movement test
Assemble the full costume several days before the event. Walk for at least 30 minutes, use stairs, sit, crouch, reach overhead, and turn quickly in both directions. Check for shifting armor, pinched fabric, loose buckles, and straps that slide toward the neck.
Repeat the test with every approved prop, pouch, and outer layer. Practice removing the warmest piece without dismantling the costume. Leather and costume armor are not certified protective equipment; use them only for their intended costume purpose.
Witcher-inspired costume checklist
- Choose one visual version or define an original monster-hunter direction.
- Fit a movable base shirt before measuring the mid-layer.
- Measure torso armor over every layer that will sit beneath it.
- Fit the cuirass before pauldrons, bracers, belts, and harnesses.
- Confirm the exact selected option and included parts on the live listing.
- Test gloves with bracers and boots with event socks.
- Keep weathering and colors consistent across separate pieces.
- Complete a full movement, seating, and heat-management test.
Browse the SokolArmory costume collection to compare complete sets and individual layers. A strong result comes from ordering the pieces logically, measuring over the correct layers, and testing the finished costume as one moving system.


User Name 2 Days ago
Lorem ipsum dolor sit amet, consectetuer adipiscing elit. Aenean commodo ligula eget dolor.