

Costume Armor for Photos vs. Active LARP
Armor chosen for a controlled photo session does not have to solve the same problems as armor worn through hours of active LARP. A camera-first build can emphasize silhouette, surface detail, and one strong viewing angle. An event build must also work while you walk, sit, turn, carry gear, manage heat, and follow the organizer's rules.
The label on a product page is only a starting point. Compare the actual construction, fit, range of motion, retention, and event requirements before deciding where a piece belongs.

Start with the job the armor must do
Write a short use brief before shopping. For photography, record the planned poses, framing, location, weather, shoot length, and whether the costume will be seen from every side. For LARP, add walking distance, expected wear time, terrain, combat rules, storage needs, and the movements your character will perform.
A dramatic shoulder line may be perfect in a portrait but awkward in a crowded tavern scene. A long skirt or hanging panel may photograph beautifully yet catch under a knee when crouching. A rigid collar can hold a commanding shape while restricting head movement. None of those details is automatically wrong; each needs to match the assignment.
Check the live rules of your specific event. Organizers decide what materials, edges, protrusions, weapons, and contact are permitted. A listing that mentions LARP does not replace inspection or approval by the event staff.
Photo armor prioritizes the image
For a photo session, begin with the intended frame. A close portrait rewards readable texture around the chest, shoulders, neck, and forearms. A full-body composition depends more on the outer silhouette, belt placement, leg line, and footwear. Studio lighting may reveal surface relief that disappears in flat daylight, while a dark costume can lose separation against a dark background.
Camera-first armor can be fitted for a small set of poses and a limited wear period. Hidden clips or temporary adjustments may be acceptable when they remain secure and invisible from the chosen angles. The tradeoff is that the same setup may not remain comfortable or aligned during a full day of movement.
Make a test photograph in lighting similar to the planned shoot. Check the front, back, and both sides even if only one view is expected. Reflections, gaps, twisted straps, and exposed closures are easier to correct before the photographer and location are booked.

Active LARP adds movement and retention
For active wear, judge the armor as part of a moving system. Raise both arms, rotate the torso, sit, kneel, climb stairs, and reach the items you will carry. Watch what happens at the neck, underarms, waist, and hips. Those contact zones often reveal conflicts between armor and the garments beneath it.
Every strap and closure needs a clear purpose. It should keep the piece from shifting without concentrating pressure in one small area. Loose ends should not snag neighboring layers. Components that look aligned while standing still should stay aligned after repeated walking and bending.
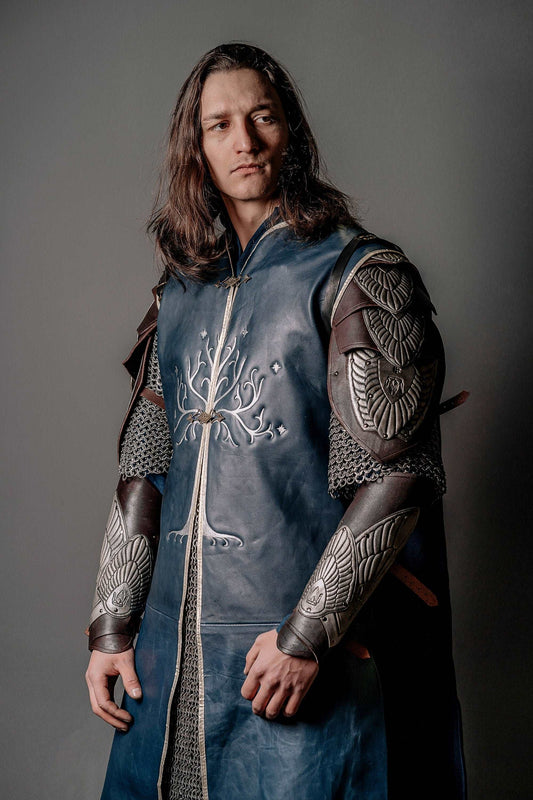
Segmented construction can support movement when the pieces and attachment points fit the wearer correctly. The current Viking leather shoulder armor listing describes segmented pauldrons and offers a one-piece or two-piece selection. That is useful product information, but fit, layer thickness, and event approval still need separate checks.
Do not confuse costume armor with certified protection
Costume and LARP armor should not be assumed to provide protection for reenactment combat, sports, stunt work, riding, or any other hazardous activity. Product photographs and visual weight do not establish a safety rating. If an activity requires protective equipment, follow its written standards and use equipment approved for that activity.
For costume use, inspect edges, corners, fasteners, and hardware anyway. Look for any point that could scratch the wearer, catch another participant, or damage clothing. Repeat the inspection after transport and after the first full wear test.

Compare weight, coverage, and ventilation as a system
More coverage changes both the silhouette and the wearing experience. A full torso piece may create a clean, powerful outline, but it also overlaps more of the base layer. Shoulder pieces add width and can interact with a cloak, weapon strap, or backpack. Bracers affect glove and sleeve choices. Belts can change how the lower edge of a cuirass sits.
Plan the complete layer order: base garment, padding if required by the event, torso armor, shoulders, belt, forearm pieces, accessories, and carried equipment. Test all of it together. A comfortable component can become restrictive when two neighboring pieces compete for the same space.
The active LARP leather cuirass with brass accents listing identifies a leather cuirass with brass details. Its photographs clearly show front and back construction. Use those views to study coverage and closure placement, then rely on the live listing and seller guidance for the selected option rather than estimating fit from the mannequin.
Measure over the layers you will actually wear
Armor measurements are only useful when the measuring method matches the maker's instructions. Do not add arbitrary ease or copy the labeled size of a shirt. Wear the planned base layers, use a flexible tape, keep it level, and record the result in the requested units.
SokolArmory's measurement page says customers select their usual clothing or shoe size when ordering and receive measurement instructions by email after payment. Follow those item-specific instructions. If the base layer changes after measurement, ask whether the affected numbers should be taken again.
For shoulder and torso pieces, also note where straps will cross other garments. Photograph the measuring position if clarification may be needed. A clean record prevents a remembered number from being applied to the wrong body landmark.
Use product photos to ask better questions
Product photos are most useful when you read them for construction rather than treating them as proof of performance. Look for front and back views, closure placement, overlap between sections, the shape of arm openings, and the layers worn by the model. Note any accessories shown only for styling.
The current in-stock leather armor listing identifies leather, brass, cotton, and wool among its materials, lists one M size, and states that displayed accessories are not included. It is active and available at the time of this review. Confirm the live page before ordering because size, availability, and included parts can change.
When browsing the broader armor collection, compare pieces by coverage and attachment method first. Color and decorative detail matter, but they cannot correct a shoulder piece that conflicts with a cloak or a torso piece that prevents sitting.
Run two different tests before committing
The camera test
- Photograph the complete costume from the planned distance and angle.
- Check whether dark materials separate from one another.
- Look for twisted straps, gaps, exposed closures, and uneven hems.
- Try the exact poses required by the shot list.
The event test
- Wear every layer for a meaningful rehearsal, not a one-minute mirror check.
- Walk, sit, crouch, turn, reach overhead, and use stairs.
- Check access to water, identification, medication, and storage.
- Reinspect fasteners and edges after the movement test.
- Confirm the final setup against the organizer's current rules.
Choose based on the harder use case
If one armor setup must serve both photography and active LARP, design around the event first. Movement, secure attachment, and rule compliance are harder to add at the last minute than visual detail. Styling, lighting, removable accessories, and controlled posing can then strengthen the photographs without changing the core fit.
For a project that needs changes to coverage, color, or component arrangement, the custom-order page explains how to submit references and project details for discussion. Keep the brief specific: intended activity, required pieces, planned underlayers, measurements, deadline, and event restrictions.
The useful question is not which label sounds tougher. It is which armor remains convincing and workable in the conditions where you will wear it. Define those conditions, verify the live product details, and test the complete system before the event or shoot.


User Name 2 Days ago
Lorem ipsum dolor sit amet, consectetuer adipiscing elit. Aenean commodo ligula eget dolor.