

How to Choose a Viking Costume That Layers Well
A Viking costume layers well when every piece has a clear job and enough room for the layer beneath it. Start with the garment that touches the body, add trousers, then build outward with a vest or armor, belt, bracers, and footwear. Choose the outer silhouette only after you know what must fit underneath.
This order matters for comfort as much as appearance. A good tunic can bunch under a vest that is too tight. A wide belt can block the lower edge of armor. Bracers can collide with sleeves or gloves. Planning the stack before ordering helps you avoid those conflicts.
Define the event before choosing the layers
A costume for indoor cosplay does not need the same layer plan as an outdoor Ren Faire or an active LARP event. Write down the likely temperature, how long you will wear the outfit, how much walking or kneeling is involved, and which pieces you must be able to remove.
For a warm venue, make the recognizable outer layer removable without leaving an incomplete base. For a cool event, leave room for a practical layer that does not distort the costume. If you expect combat or athletic movement, check the organizer's rules and choose components that fit the activity; a product category does not serve as a safety certification.
Decide whether you want a character recreation, a broadly Viking-inspired silhouette, or a modular LARP wardrobe. A close recreation places more weight on matching the photographed layers. A modular outfit benefits from a simple tunic, trousers, and belt that can work with more than one vest or armor piece.

Build from the base garment outward
The base garment controls how the rest of the costume sits. Its sleeves affect bracers. Its hem affects the belt and skirt layers. Its neckline remains visible beneath an open vest, so trim and color can carry more of the character than expected.
Choose a tunic with enough ease for raising your arms and sitting, but avoid excess fabric where armor must lie flat. Test the tunic with the planned belt position. If the hem gathers heavily above the belt or pulls across the shoulders, adding a fitted outer layer will make the problem more noticeable.
The active SokolArmory medieval linen tunic is currently listed as one tunic in sizes S through XXL. Its page describes a handmade natural-fabric garment intended to be worn under armor. Use the live size information and the maker's instructions rather than assuming your usual shirt size will behave the same beneath another garment.
Measure for the complete stack
Measurements for a fitted outer layer should reflect what you will wear under it. Put on the intended shirt, tunic, or padding before measuring the chest, waist, shoulders, and arms. Do not add an unrequested allowance; tell the maker what you are wearing and follow the specified method.
SokolArmory provides an about measurements guide for its orders. Check the instructions attached to the exact product as well, because a tunic, vest, trousers, and boots need different dimensions. Record the date and keep the measurement set with the order details.
Pay special attention to interfaces between pieces. Measure the forearm with the intended sleeve if bracers go over it. Measure the waist at the actual belt height. Check the calf with trousers tucked into the boots if that is how the costume will be worn. These contact points cause more layering trouble than isolated letter sizes.

Choose the torso layer by coverage and closure
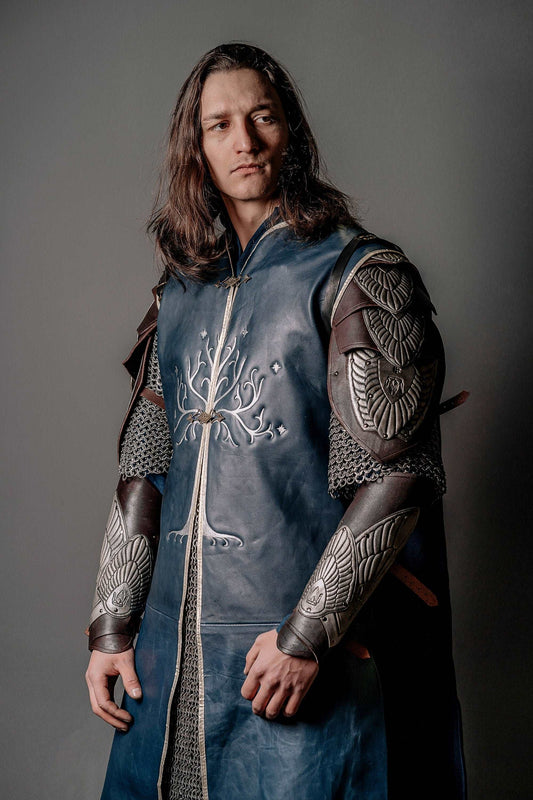
A vest or armor layer changes shoulder width, torso length, and heat retention. Before buying, identify where it ends relative to the belt and hips. A long vest can interfere with sitting or overlap a wide belt. A rigid or heavily paneled piece may need more room at the chest and shoulder than a soft garment.
Inspect the closure path. Front lacing, side lacing, straps, and buckles all need access after the garment is on. If another belt crosses those closures, plan the dressing order and make sure you can still adjust the torso layer.
The active Ivar vest and belts listing describes a lower vest and belt set made to individual measurements, with current S through XL options tied to payment choices. The photograph shows a dense, structured torso layer. Treat it as its own fitted component: confirm the underlayer and measurements rather than sizing it in isolation.
Use the belt to organize, not repair, the fit
A belt can define the waist, support a pouch, and control loose outer layers. It should not be used to force an oversized vest into shape or hide a tunic that is too tight across the chest. Those problems return as soon as you sit, bend, or remove the belt.
Set the belt height while wearing the full torso stack. Then sit in a chair, crouch, and raise one knee. Check whether the buckle presses into armor, the belt rides up, or the tunic pulls from under it. If you plan to carry pouches or props, repeat the test with that weight attached.
Keep closures from stacking directly on top of one another. A tunic knot, vest buckle, and belt buckle placed at the same point create a hard lump and can make the outer silhouette uneven. Offset them when the design allows it.

Plan trousers, boots, and lower-leg layers together
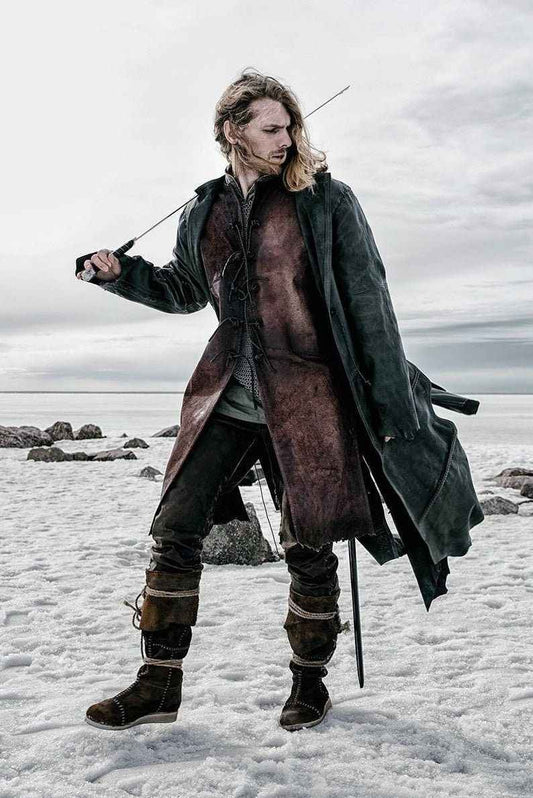
Trousers affect stride, kneeling, and how the boots fit. Decide whether the legs will be tucked into boots, covered by wraps, or worn over footwear. Each choice changes the amount of material around the ankle and calf.
The active medieval Viking leather pants listing describes one pair made to measurements and currently offers several colors in XXS through XL. Because leather trousers and tall boots meet at the lower leg, provide the maker with the intended footwear and layering plan if the fit there is critical.
Test a deep step, a kneel, and a seated position. Look for pulling across the knee, material bunching inside the boot, and lacing that rubs against the other leg. If wraps are part of the costume, secure them without restricting circulation and test them long enough to see whether they slide.
Use the Ragnar listing as a layer map
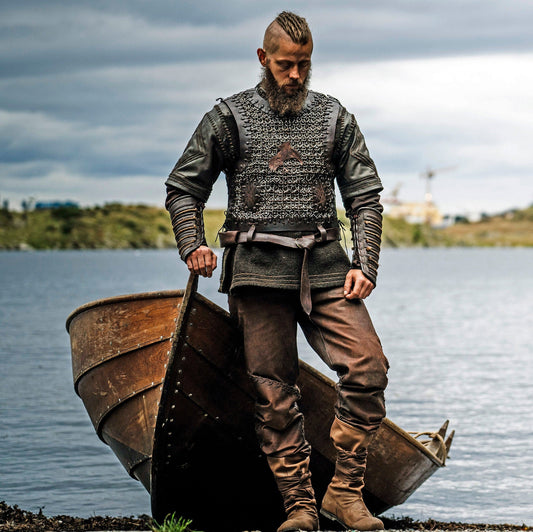
The active Ragnar costume (Vikings season 2), SKU cst001, shows a complete layered system. Its written description lists a vest with chainmail, an under-shirt, belt, bracers, leather pants, and boots. The current selector offers full-costume payment options and also separate choices in S through XL for a vest with chainmail, wool tunic, thin belt, pair of bracers, leather pants, and pair of boots.
The written description and selector do not use identical names for every layer. The description calls the underlayer a leather shirt, while the individual option says wool tunic. The description uses a general belt label, while the option says thin belt. Confirm the exact component associated with your selection before ordering instead of relying on a photograph or combining the two labels.
As a planning tool, the product page is useful because it separates the outfit into six functional zones: base torso, outer torso, waist, forearms, legs, and feet. You can use the same map even if you choose different garments. Solve one zone at a time, then test the complete combination.
Test heat, movement, and dressing time
Wear the complete costume indoors before the event. Include the socks, boots, belt load, bracers, and any cloak or prop. Walk, use stairs, sit, kneel, reach overhead, and use your phone. A problem that appears after ten minutes may become the only thing you notice after several hours.
Practice removing the hottest outer layer without taking apart the whole costume. Decide where that layer can be carried or stored. If the base layer becomes visually incomplete when the armor comes off, add a simple belt or accessory that preserves the silhouette without trapping the same amount of heat.
Time the dressing process once. Complex lacing and overlapping belts may require a second person. If that help will not be available at the event, simplify the sequence or choose closures you can reach.
Confirm exactly what the option includes
Read the current variant selector separately from the title and hero photograph. A page may show a full costume while offering a component, or show multiple styled accessories that are not included with one selection. Save the selected option and written component list with your order.
If you need different materials, colors, proportions, or a nonstandard combination, discuss it through the custom-order page before assuming a standard listing can be changed. Provide front, back, and detail references, plus the event date as context. Do not rely on an unconfirmed production or delivery estimate.
Final Viking costume layering checklist
- Define the event, temperature, movement, and removal needs.
- Choose the base tunic before measuring a fitted outer layer.
- Measure over the actual garments that will sit underneath.
- Check where the vest, belt, bracers, trousers, and boots overlap.
- Avoid stacking several hard closures at one point.
- Test sitting, kneeling, stairs, a long stride, and overhead reach.
- Practice removing the warmest layer and storing it.
- Verify the live option and included components before checkout.
- Confirm any description-versus-selector mismatch in writing.
The best Viking costume is not the one with the most layers. It is the one whose layers work together: a base garment that moves, an outer piece measured over it, a belt that organizes the silhouette, and lower-body pieces that remain comfortable through the event.


User Name 2 Days ago
Lorem ipsum dolor sit amet, consectetuer adipiscing elit. Aenean commodo ligula eget dolor.