

How to Choose LARP Armor for a Full Weekend Event
Choosing armor for a two-hour photo session is easy compared with choosing armor for a full LARP weekend. The longer event asks more of every buckle, shoulder edge, underlayer, and adjustment point. A strong design still needs to let you walk between camps, sit through briefings, raise your arms, eat, and manage changing weather without constant repairs.
The best answer to how to choose LARP armor starts with the event rules and the way you expect to play. After that, compare fit, coverage, materials, and layering as one system. This guide gives you a practical way to make that decision before you spend money or arrive at check-in.
Choose for the event, not the character sheet
Read the organizer’s current armor and safety rules before shopping. Different games may score armor by material, coverage, thickness, construction, or appearance. Some events separate costume armor from combat-approved equipment. A product description can tell you what an item is made from, but only the event staff can tell you how their rules apply to it.
Next, write down what the weekend will require. A social character who spends most of the event in camp has different needs from a front-line fighter who expects repeated movement. Consider the expected temperature, rain, terrain, sleeping arrangements, and how often you can return to your tent or vehicle. This list turns an attractive armor design into a practical purchase decision.
Decide what coverage earns its place
More coverage may support the visual silhouette or the game’s armor system, but it also adds weight, heat, and more places where pieces can overlap. Start with the areas that matter for your rules and character concept. Then ask what each added piece contributes. A cuirass with open arms may move and ventilate differently from a full combination of torso armor, pauldrons, bracers, and leg protection.
Browse the SokolArmory armor collection to compare body armor, shoulder pieces, helmets, and bracers as separate components. Building in stages can make fitting and field testing easier than buying every layer at once.
Make fit and movement your first physical test
Armor that looks correct while you stand still can shift when you crouch or reach. Wear the same shirt, tunic, or padded layer you plan to use at the event when you take measurements and test the finished kit. Follow the maker’s requested measurement method rather than relying on the size printed inside an everyday jacket.
SokolArmory provides an armor and costume measurement guide. Use it carefully, and ask for clarification if a point is unclear. For an adjustable ready-made piece, compare your body measurements and underlayers with the actual garment dimensions before ordering.
Run a simple movement check once the armor is on:
- Raise both arms overhead and across your body.
- Turn your torso without forcing the armor to follow.
- Sit on a bench and rise without using your hands.
- Crouch, take a long stride, and climb a few stairs.
- Reach every buckle or fastening you may need to adjust alone.
Stop if an edge presses into your throat, armpit, hip, or rib area. Check for pinching straps and hardware that catches fabric. Small discomfort during a five-minute fitting can become a serious distraction after several hours.

Build a wearable layer system
Treat the garment under your armor as part of the fit. A tunic or other suitable base layer keeps hardware and leather away from bare skin, while a padded garment changes the amount of room inside the armor. Do not assume that a cuirass fitted over a thin shirt will also fit over a thick gambeson.
Plan for temperature changes with removable layers. Keep spare dry base clothing in camp if the forecast calls for rain or heavy activity. During hot conditions, shorten demanding activity, use shade, and take water breaks. The CDC’s current heat guidance recommends staying hydrated, taking breaks, choosing cooler periods for outdoor activity when possible, and recognizing signs such as dizziness, weakness, nausea, headache, or unusually heavy sweating.
Armor can make it harder to notice rising heat until you stop moving. Agree on regular check-ins with another player, especially during long battles or marches. If you feel faint or weak, leave play and cool down rather than trying to finish the scene.
Match materials and construction to the weekend
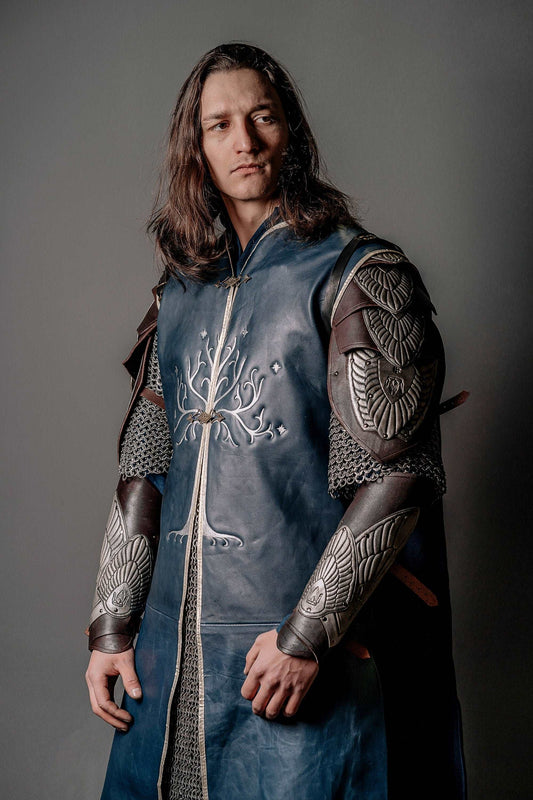
Leather armor can provide a flexible, layered silhouette, but different designs distribute weight differently. Look at the width and placement of shoulder straps, side closures, overlapping plates, exposed rivets, and edges. Broad contact areas often feel different from narrow straps under the same total weight. Articulated sections may improve movement only when their hinges and overlaps align with your body.
Inspect photographs from several angles. A front view shows the visual design; a back view reveals the adjustment system; a close-up shows edges, rivets, surface finish, and how separate sections meet. Ask the seller for missing views instead of guessing.

Use verified product examples to compare options
The current ready-to-ship M-size leather armor listing describes a combination of natural leather, brass, cotton, and wool. Its straps provide adjustment, and the photographs show a torso piece worn over a long tunic. Because the listing is for one M US size, confirm measurements and intended underlayers before treating adjustability as a substitute for fit.
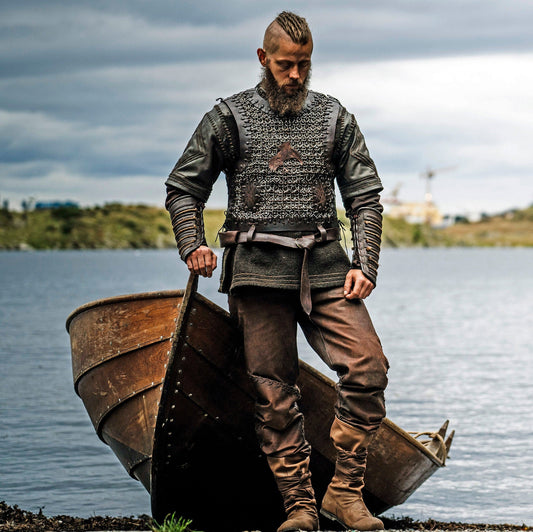
A different leather cuirass with metal accents shows another approach: a shaped torso with layered plates and substantial shoulder construction. Comparing these examples helps clarify your preference for open movement, visual mass, hardware, and coverage. Check each live listing for current options and availability before ordering.
If the standard design does not match your measurements or character brief, start a conversation through the custom-order page. Send a concise reference set, the event date, required coverage, intended layers, and any organizer rules that affect the build. Do not rely on an event deadline until the maker confirms the schedule.
Test the complete kit before packing
Do at least one extended wear test at home. Assemble the exact tunic, belt, armor, gloves, footwear, pouches, and props you plan to carry. Wear them for an hour of ordinary movement, then note every hot spot, loose fastener, blocked pocket, and noisy or catching overlap.
Repeat the test after making adjustments. Practice taking the armor off without help. Pack basic maintenance items that suit the hardware and materials, plus spare laces or other approved fasteners. Keep any care product away from the armor until you have confirmed it is appropriate for the specific finish.
A practical LARP armor buying checklist
- Confirm the event’s current armor, combat, and safety rules.
- Choose coverage for your role, expected activity, and climate.
- Measure over the layers you will actually wear.
- Check arm movement, sitting, crouching, and independent adjustment.
- Review front, back, side, and close-up photographs.
- Verify materials, included pieces, live availability, and timing with the seller.
- Plan shade, water, breaks, and a lighter configuration for hot periods.
- Complete an extended wear test before the event.
Good weekend armor should support the character after the opening scene, when the weather changes and the miles add up. Choose the piece that fits your body, rules, layers, and schedule, then prove the setup in motion before you take it into the field.



User Name 2 Days ago
Lorem ipsum dolor sit amet, consectetuer adipiscing elit. Aenean commodo ligula eget dolor.